Wednesday, September 14, 2011

Downloading files on your iPhone

I just cannot believe how long its been since a blog post, there are just not enough hours in a day.  Then, when I do pop a post up its nothing to do with forensics, great!

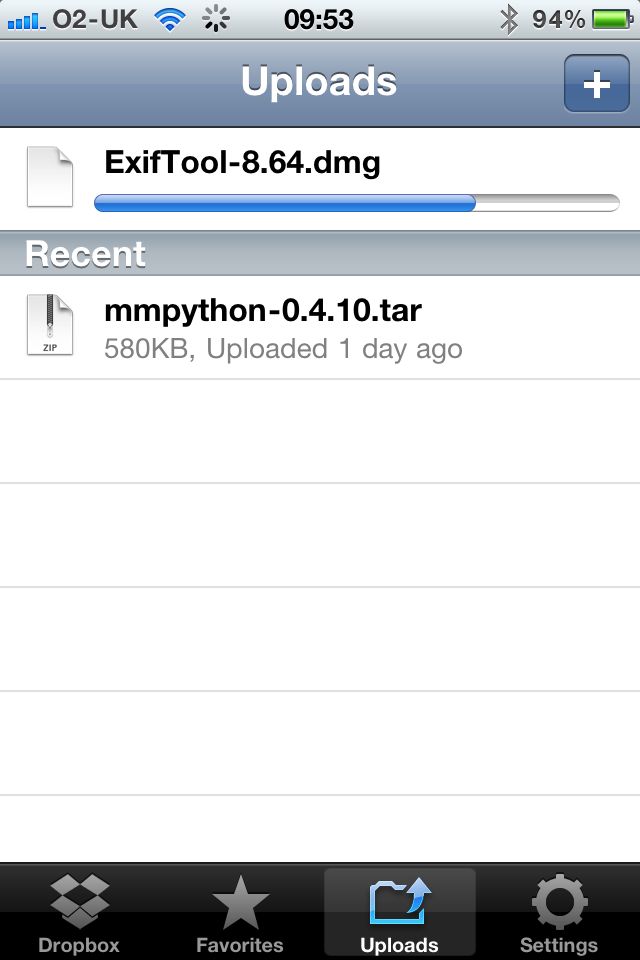
I wondered if you have ever had the issue of browsing on your iPhone when you find just the file you are looking for, perhaps a tar, zip, dmg or some other file type that the iPhone does not let you download but that you don't want to browse away from and risk losing for good.  I've found a simple way to achieve it.

If you download the Dropbox app it becomes a option to 'Open with' when browsing the web.  Simply:-

1.  Browse to the file you want to download


 2.  Select Open in Dropbox from the screen and it will copy the file from the site to your Dropbox box account letting you access it from your computer later.


Its already proving to be very handy indeed. Give it a go.

One other small thing, if you hold down shift on your Mac whilst minimising or maximising a window it does it in cool slowmo!  Who knew!

Thursday, March 31, 2011

Intel SSD's have default AES encryption - worried?


Intel have announced their range of new SSD's with a range of security and data stability tools, the 320 range. The include sizes from 40gig to 600gig (if you have the money!) and my experience is that they are crazy fast. Putting your OS on one of these would make a huge difference to the speed of the overall machine.

However, Intel state that they come with a default AES 128 full disk encryption system which apparently successfully finds the trade off of speed and encryption/decryption. The thought of new machines coming already set up with an AES flavour is enough to make the average digital investigator hang up his mouse and go stack shelves in Salisbury's (small print - other supermarkets also offer shelf stacking opportunities) . Should we be worried?

No.

It is true that the disk, out of the box comes running a AES 128 key providing full disk encryption. However, plug the disk into your machine and it will run with no seeming encryption involved at all? How so? Simply because there is no user key set up as default. To make the encryption 'work' as a security layer the user has to set up an ATA BIOS user password to secure the encryption key. Don't set up a BIOS password, no useful encryption. Excellent!

You can check out the security document here.

Knowing bad guys, and most of us have the misfortune of knowing their computers rather well, they are notoriously mistrusting of encryption and it is unlikely that the computer they buy will come with a big sticker saying how vital it is that they set a BIOS password. Indeed, many people believing that they are experts will read the drive specs, see AES 128 and believe that they are more secure than NASA. All which makes me think I should delete this blog post? Ah well, no one reads it!

Friday, March 4, 2011

Exif and GPS data on a Mac

I was kicking around yesterday looking for a decent Exif viewer for the Mac, I found one or two but they didnt support extraction of GPS data. Turns out my time was wasted and OSX supports and reports Exif data including GPS location data.

Step 1. Open your image in Preview mode.

Step 2. Cmd-i to Open Inspector

Step 3. Click the 'i' tab and select Exif or GPS button


It even has a 'Locate' button to fire the coordinates up in Google maps. Simple and brilliant.

Although there isn't an export feature, the dialogue does allow you to copy and paste the data out into a text program.

Gotta love your Mac!

Wednesday, February 16, 2011

Volatility 1.4

This is just an initial post about the beta availability of Volatility 1.4. I've been teaching 1.3 as part of my Advanced Live Forensics course for 18 months or so but it only supports XP SP2 and 3 RAM images. The new 1.4 version from the devs and helpers at www.volatilesystems.com have been toiling over this version for somewhile and its great to at last have a play with it.

First things first you can find proper 'how to' resources at http://code.google.com/p/volatility/ but downloads are currently limited to within svn. If this is new to you its easy enough. If you are using a Mac with Snow Leopard just open a terminal and type 'svn checkout http://volatility.googlecode.com/svn/branches/Volatility-1.4_rc1'. This will download the 1.4 version and put the Volatility files in your user root folder.

Once downloaded just 'cd Volatility-1.4_rc1'. Anyone used to the old version will see a small difference in the running of the commands. Instead of-

python volatility pslist -f [pathtoRAM]

..you have quite a different syntax. It breaks down like this-

python vol.py [plugin] --profile=[PROFILE] -f [image]

vol.py replaces the old volatility framework command
plugin is the command such as pslist, psscan2 etc
profile is completely new but a vital component of the new framework. For all RAM images except from Windows XPSP2 x86 should have the profile defined at the --profile switch. The BasicUsage document lists them as:-

PROFILES
--------
VistaSP0x86 - A Profile for Windows Vista SP0 x86
VistaSP1x86 - A Profile for Windows Vista SP1 x86
VistaSP2x86 - A Profile for Windows Vista SP2 x86
Win2K8SP1x86 - A Profile for Windows 2008 SP1 x86
Win2K8SP2x86 - A Profile for Windows 2008 SP2 x86
Win7SP0x86 - A Profile for Windows 7 SP0 x86
WinXPSP2x86 - A Profile for Windows XP SP2
WinXPSP3x86 - A Profile for windows XP SP3

So running a basic pslist against myram.dd imaged from a Windows SP3 box would look like this-

python vol.py pslist --profile WinXPSP3x86 -f myram.dd

In the previous version outputing the results to a file could be achieved by using '>' or '>>' to output to a text file etc such as -

python volatility pslist -f myram.dd >> pslist.txt

However, in 1.4 we have many more options, by adding -

--output= you can specify numerous output types if the module being invoked supports it. This includes -

--output=text
--output=html
--output=csv

To check what a module/plugin supports just check help - python vol.py pslist --h and look for the output section.

You can add -

--output-file=myoutputfile.csv to name your output file. So our previous command line could look like this -

python vol.py pslist --profile WinXPSP3x86 -f myram.dd --output=text --output-file=myfile.txt

That should get you started.

There are also some exciting new modules to play with such as bioskbd a plugin based on Andreas Schusters work. It enables the reading of input text from the BIOS area of memory which can include the BIOS password or even Full Disk Encryption passwords. Check out the link to Andreas site for more information. This plug in has apparently been around for a while but I'd completely missed it. If you do check it out take note that some RAM dumping tools dont image that area of RAM. For example if you are using Matthieu Suiches win32dd tool you need to add '-t 1' to grab page zero.

Also there are some exciting malware analysis plugins such as svcscan which can list Windows services from both usermode and kernelmode and also ldrmodules for detecting unlinked DLL's.

Anyway, thats all for now, I'll try and post more in due course once I've had a proper play.

Nick

Thursday, January 20, 2011

Mac Ram Dumps

Well its finally happened, at last a tool to dump RAM from OSX. Big thanks to ATC-NY for their Mac Memory Reader which can be downloaded for free here.

The tool is very easy to use, simply unpack and open a terminal.

cd to the folder MacMemoryReader (For newbies something like - cd /Users/name/Desktop/MacMemoryReader

Run - sudo ./MacMemoryReader filename

..where the 'filename' is the path to a connected storage device

You will prompted for your admin password and off it will go.

Remember to check that your connected storage has enough space for the entire RAM dump.

If you want to feel part of the action you can throw a -g into the command line and it will provide a percentage notifier.

The program outputs a Mach-0 raw file which should respond well to data carvers and the like. Well I've only conducted a couple of tests but Photorec and Foremost do a cracking job of getting at the files. They both successfully retrieved HTML, jpg, zips and a whole variety of other files including web pages going back 3 months. My 8 Gig of Ram offered up over 38000 files. Many of them were fairly uninteresting txt files so you need to wade through to find the good stuff.

If you are trying Foremost just bear in mind the 3Gig limit, perhaps take a look at Scalpel.

The next step is to start looking for running process information, fairly critical in basic RAM analysis. I'm away teaching next week so will have some evening time to play.

I'll try and blog again soon

Tuesday, July 20, 2010

I Won Something!

I've never been big on entering competitions, mostly because maths gets in the way. You do a quick calculation on the odds of winning anything of note and realise your time is better spent working to actually earn some money the old-fashioned way.

It was rather a surprise to learn that I'd been shortlisted on the Forensic4Cast awards as Digital Investigator of the Year. It was even more surprising to win it! I would have loved to have been in Washington for the award ceremony but there we go.

Anyway, thanks to Forensic4Cast and everyone that voted for me, I'm over the moon, and looking forward to getting the award.

Thanks also to my makeup artist, my parents for all their hard work and Yoda for sticking with me throughout my Jedi training. I may cry.

Friday, June 18, 2010

Im Famous, or infamous, or neither.

Short blog this time with some shameless electioneering. I've been shortlisted as Digital Forensic Investigator of the Year.

Visit http://forensic4cast.com/2010/06/16/forensic-4cast-awards-2010-voting-is-open/ to vote. Doesn't have to be for me of course!